$0.00


Nothing is manlier than making something is just small within your hand size but useful and necessary for daily life.
This tutorial will show you how to make basic design DIY bi-fold leather man wallet, with a coin pocket on the left and card holder on the right, plus a big partition for putting cash.
Let’s Play video :
If you have been following along in the past month or two you may have seen my leather watch straps tutorial or card holder making instruction as well, it’s worth checking out as very simple after you stitch these little guys together. Give yourself almost 3-4 hours for this project.
There are some tools that you will need to get things done. We use the same tools as we did in previous tutorial: how to make a leather watch straps.
Don’t be scared of the long list, they’re quite easy to find in any leather shop since these are just basic tools so just pay a visit there and you will get them all.

Tools that you need to make the leather men wallet
- Leather (color of your choice)
- Needle and thread
- Pen & Cardboard
- Ruler
- X-acto or sharp knife
- Scissors
- Hammer – To punch holes
- Diamond Chisels
- Contact cement (for leather use)
- Lighter (to burn the spare thread)
- Die Hole Punch Snap Fasteners Press and buttons
- A penny (optional)
- Leather stitching clamp or your knees
FIRST STEP: GETTING THINGS READY
You must be making this DIY leather wallet for yourself or the loved one so choose the material that you like most. The thickness will give your project a different drape depending on what you choose. Keep in mind that the thinner leathers are, the more malleable your wallet will be
In this tutorial, I choose chrome tanned cowhides with Black Mamba color sourced from Blue Lotus Leather Workshop which I believe it will suit very well for any man.
After choosing your leather, let’s do patterns. You will need to design on the cardboard first so that you will be able to adjust if there is any mistake (recommend using cardboard since it’s more stable while drawing than normal paper)

how to make DIY leather handmade men wallet
And then cut the leathers out of your patterns. These are all the materials you will need to complete the project.
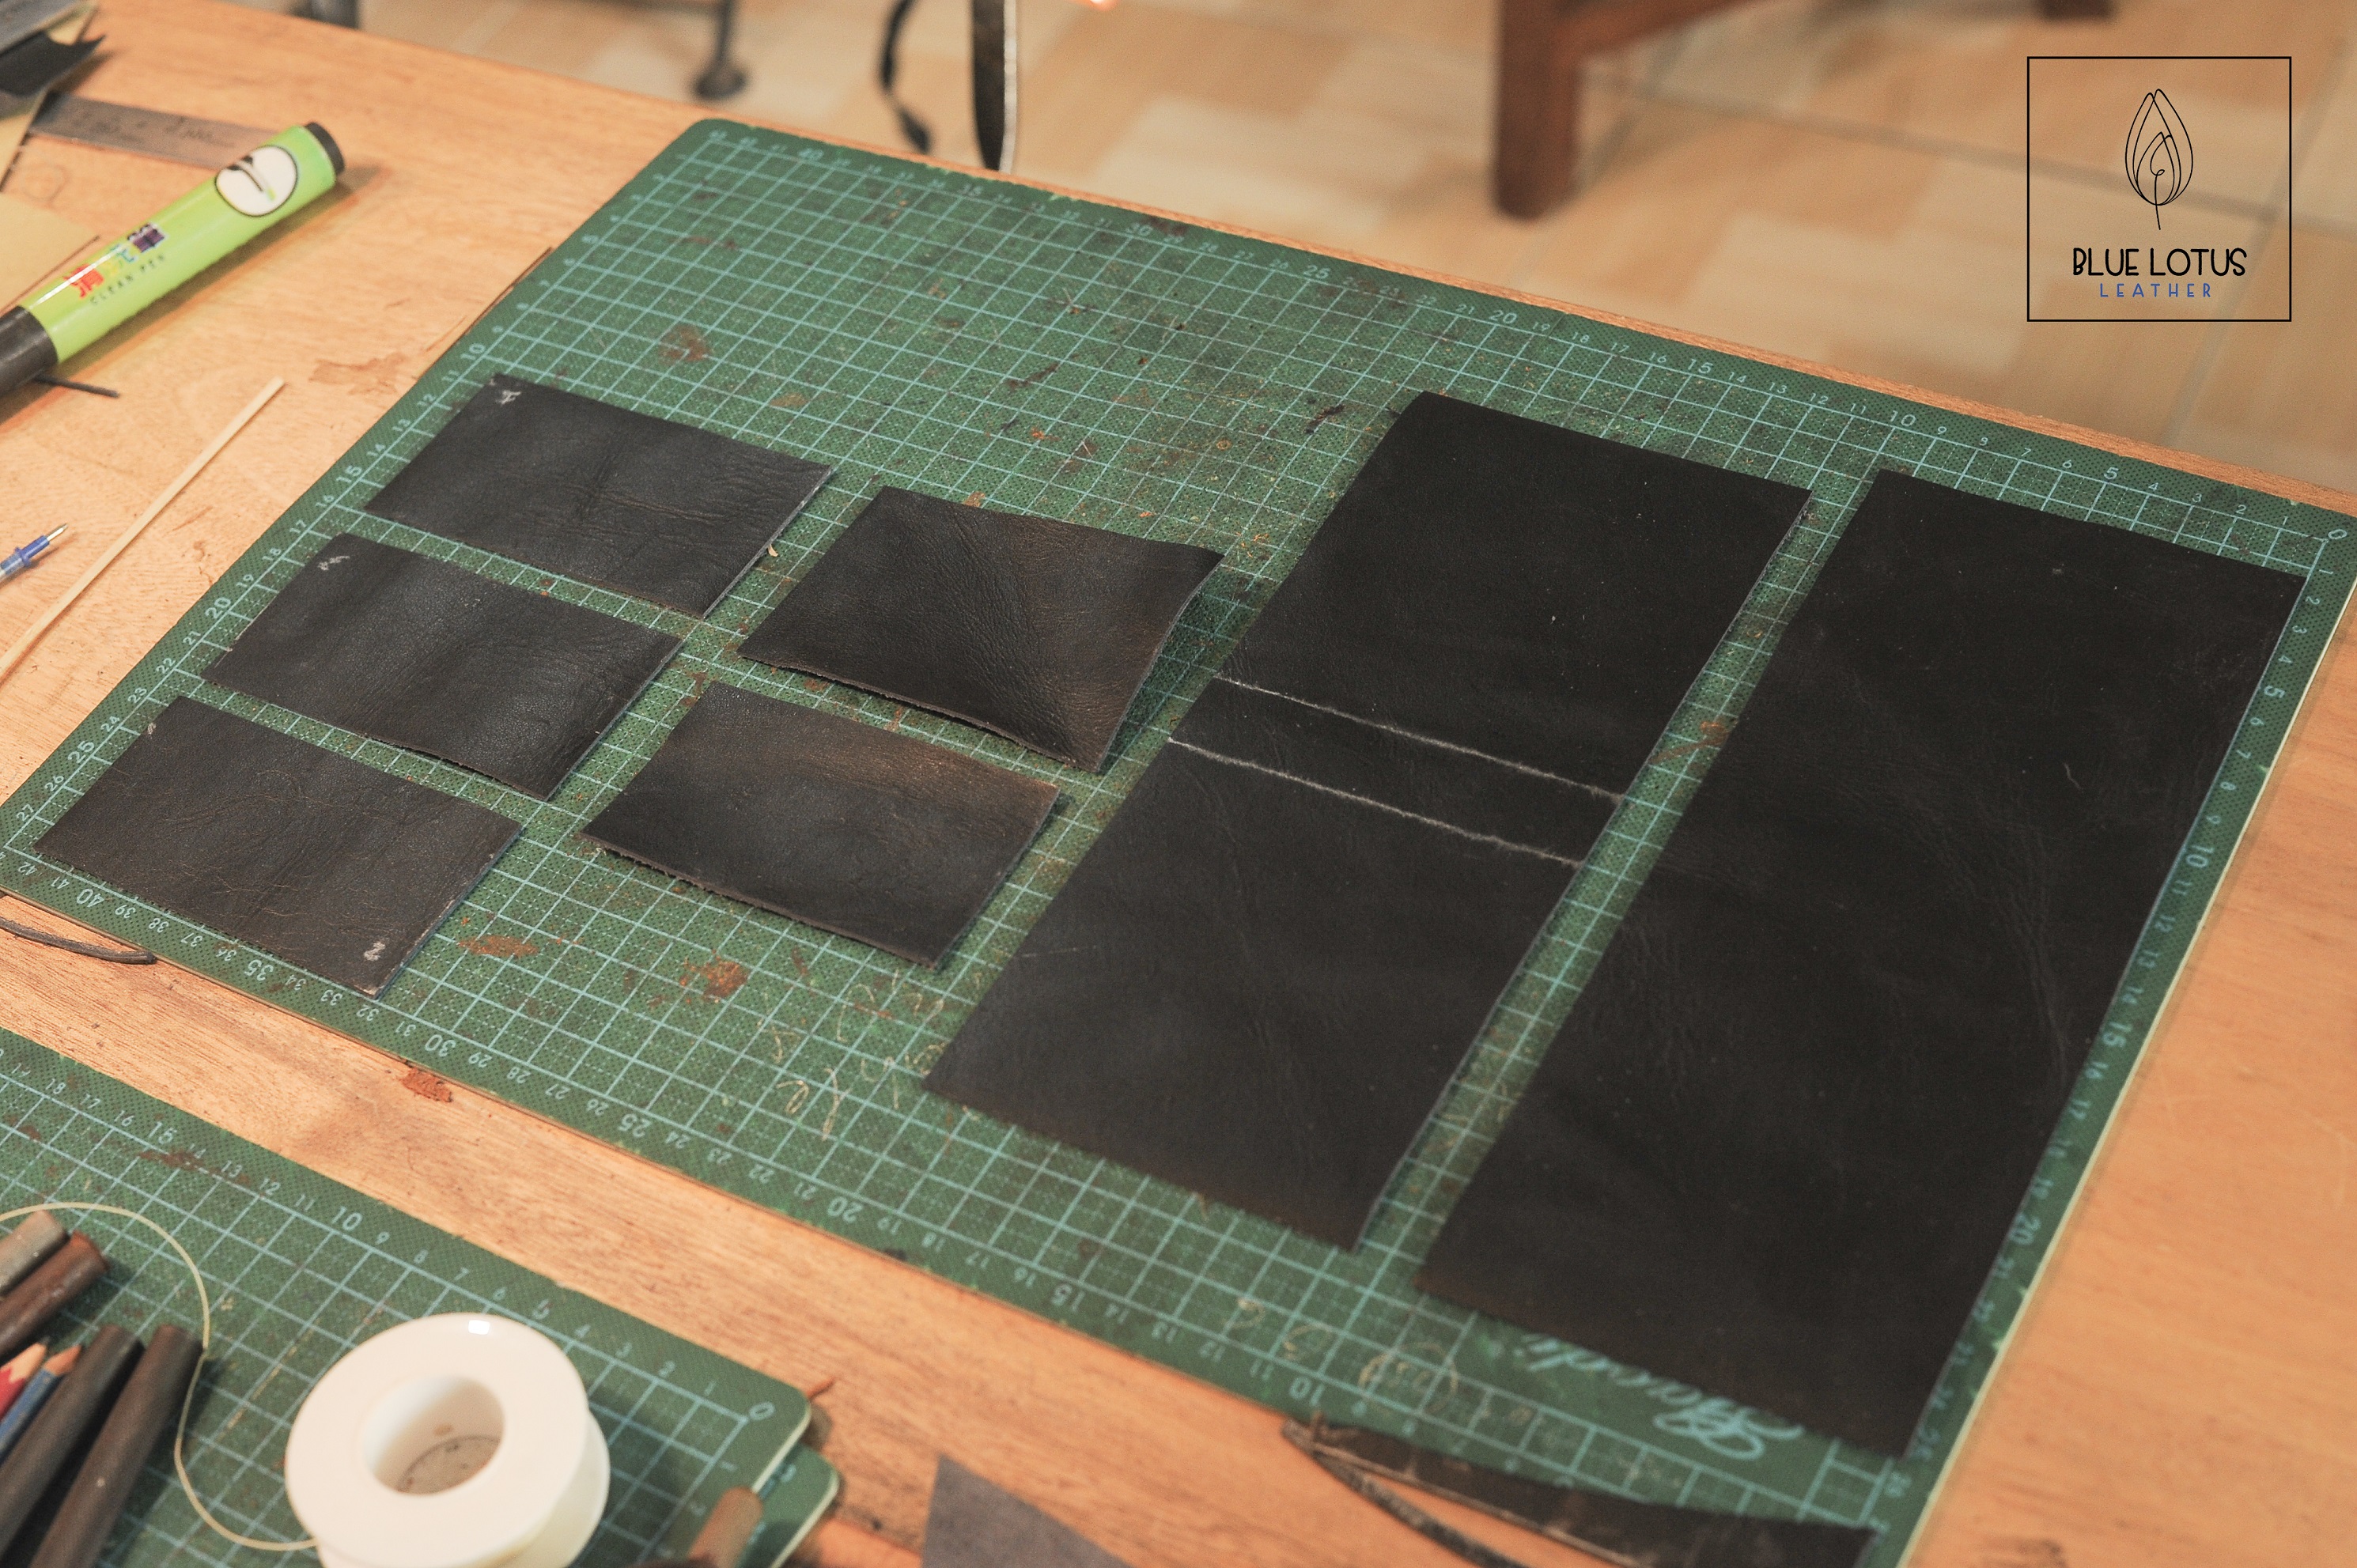
All the materials that you need
The size can be various as long as you are able to cut out 7 leather pieces
Your parameter might be different than the one I use so just relax, be creative.
- 2 big leather pieces are the main parts: one piece should be longer than the other roughly 2 cm for the thickness of money.
- 2 pieces to make the coin pocket: one for the cap, one for the body
- 3 same-size leather pieces to craft card holder. Later, I will trim a little at the edge to make it look like T shape. There’s a reason for that so keep scrolling.
STEP 2: MAKING CARD HOLDER LAYERS
As you can see in the photo, I drew 2 straight lines right in between to mark out 2 sides of the wallet. The gap between two lines is about 1.5 – 2cm. We will start with the inner side of the wallet!

I remove a bit at the long edge as my purpose is to make a little stylishness on it.
Now, let’s get into the card holders part

Stick them together with glue
I trimmed a bit on both widths (approximately 0.7-1cm from the edge) so it looks like T shape. This method is useful when you place those layer upon together so that it won’t be bulge

For the cards always need to be showed a little on the edge in order to be pulled out easily. Figure out how deep it will go inside the pocket then mark it up for the sewing line so you will know where to start piercing it with a hammer.

I stick the card holder piece to the main one with contact cement first, wait a moment to let them dry and then punch evenly spaced holes to make it ready to be stitched. Stitching needles are heavier, longer, duller, and have a larger eye than cloth sewing needles. As opposed to it, leather needle is not intended to create its own hole as the materials are tenacious and sometimes very thick. A hole is punched through the leather by an awl or chisel, then the needle is pushed through.
We’ll use two needles, one on each end of waxed thread. This thread is much heavier and stronger than cloth thread and is typically made from multiple cords of strong linen or synthetic material.

Keep doing the same with 2 others. Alternately place them on each other and securely sew them on the left width first. Be noticed that the last (a.k.a the top) layer of the card holder is no need to be a T shape. You will know why is that 😀
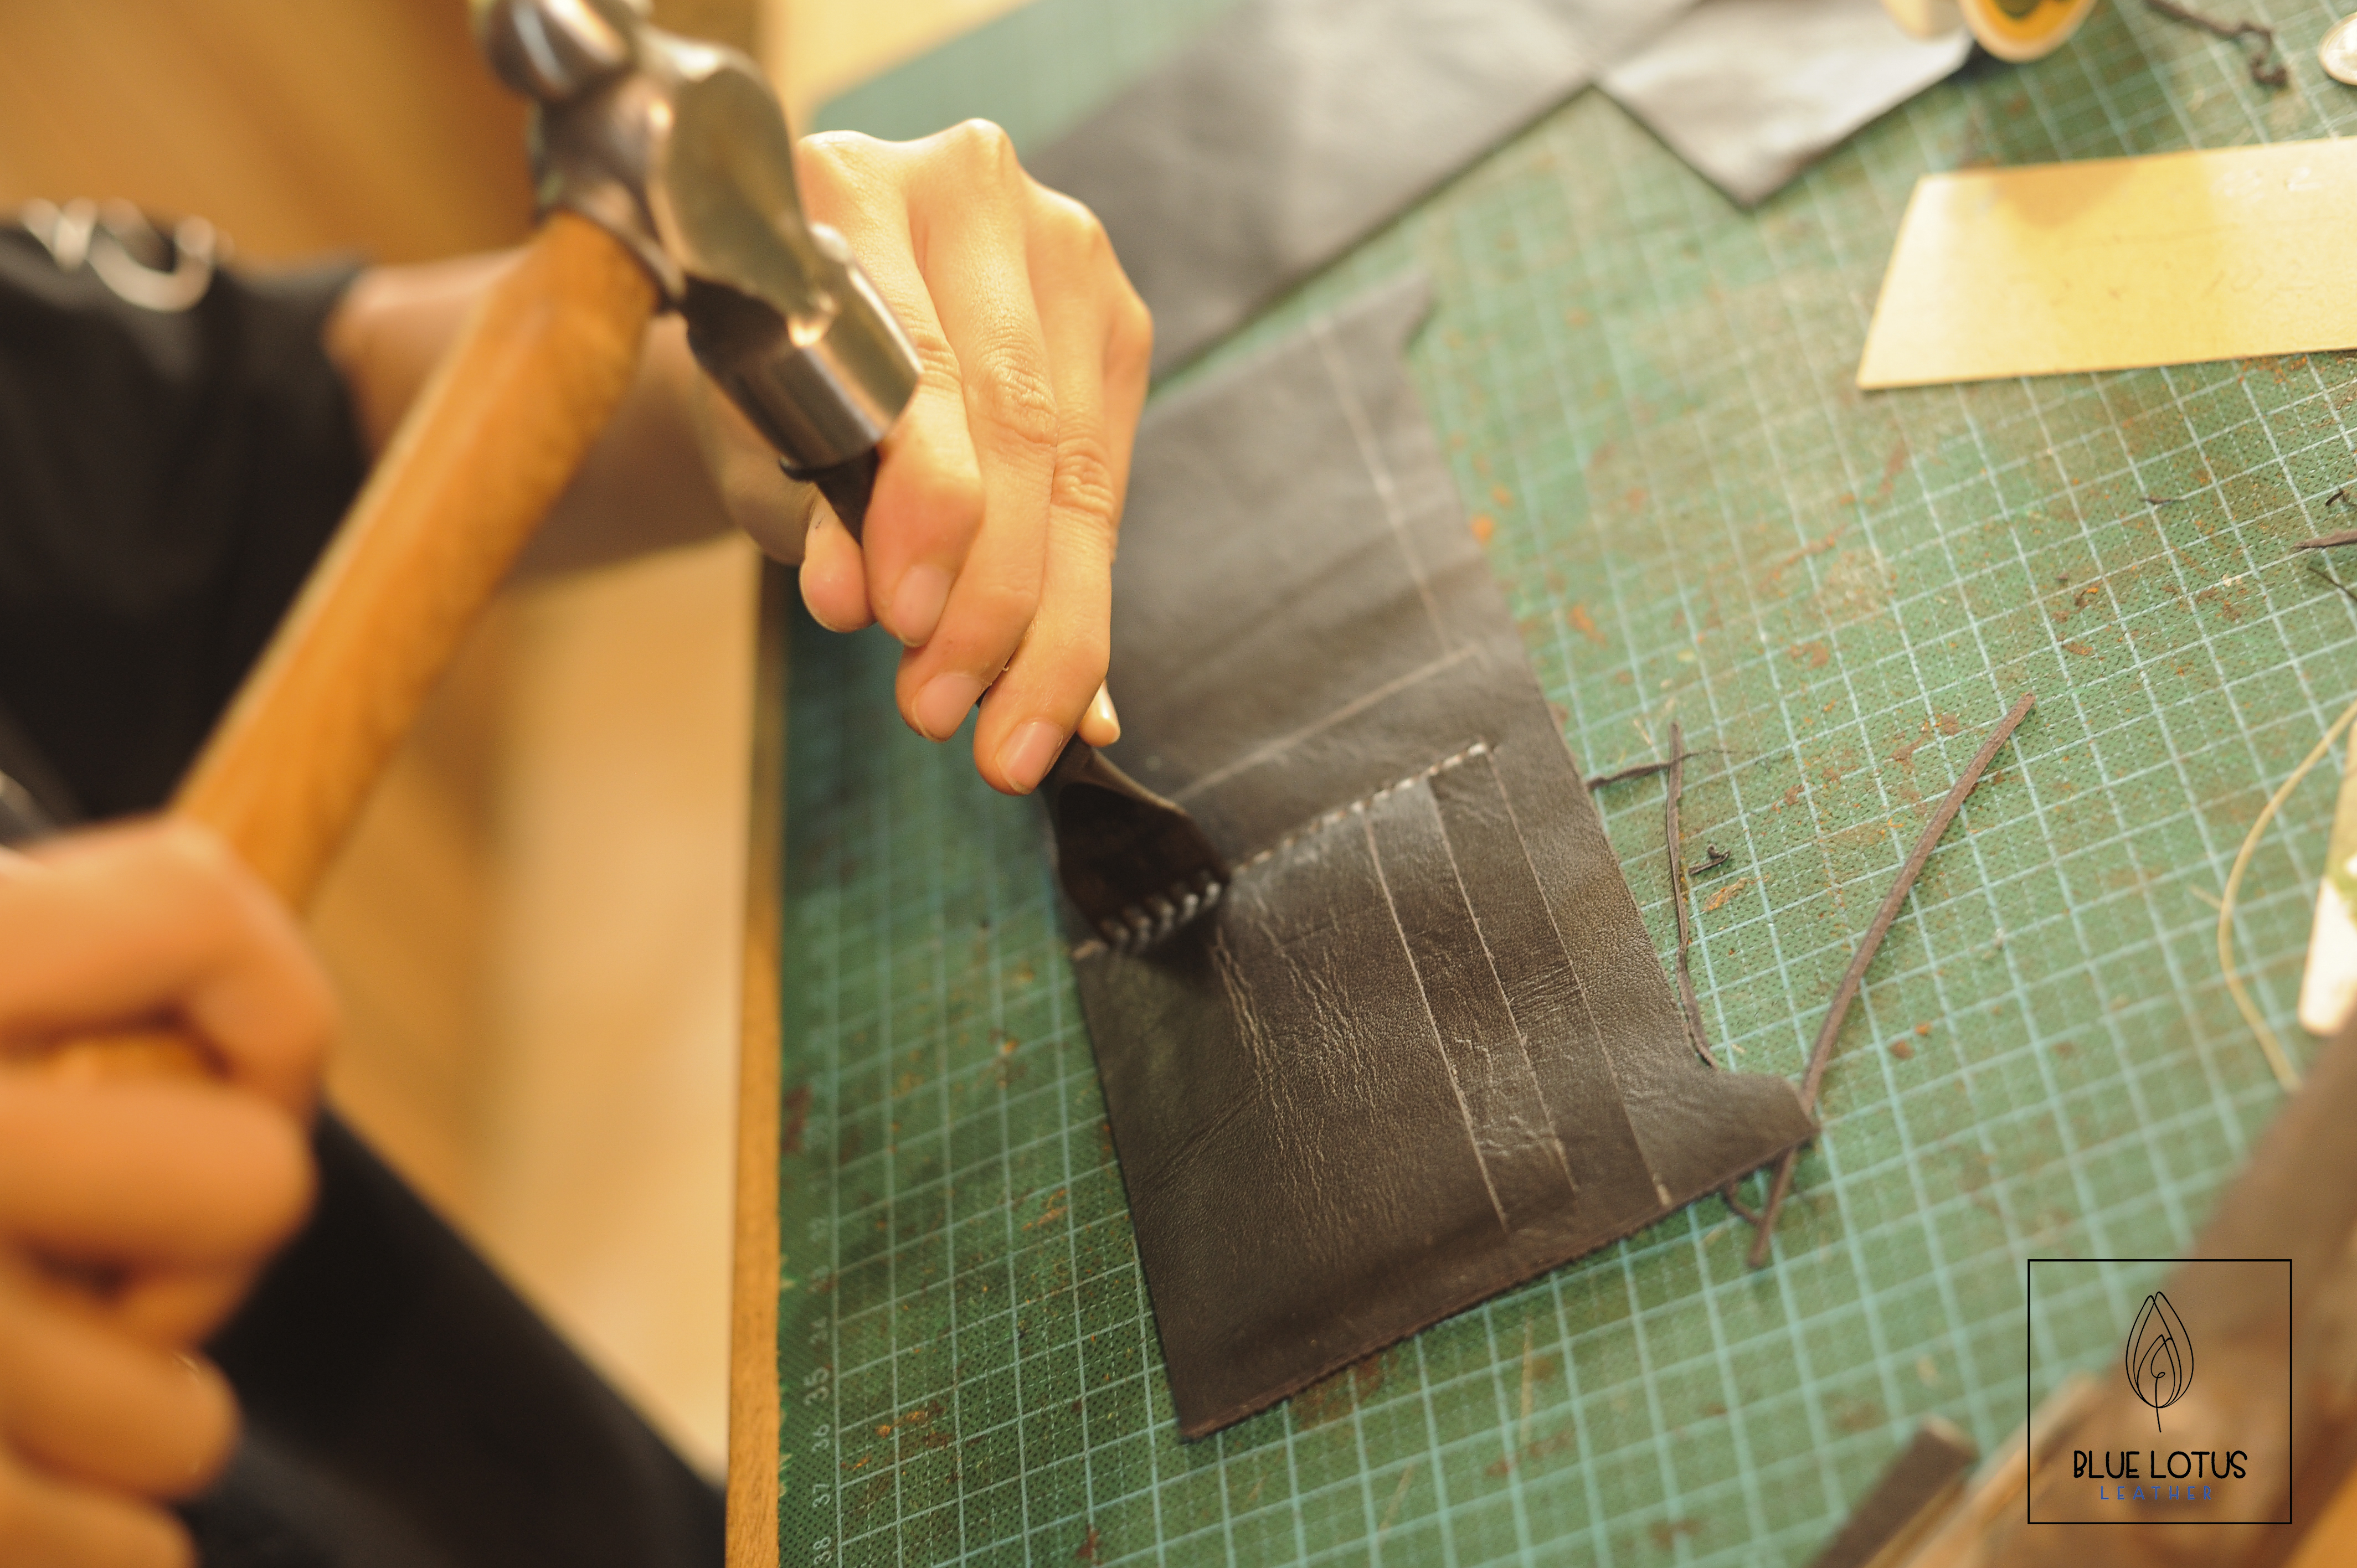
Keep sewing the following part. Much similar the previous steps: punch holes then stitch

The difficult time has passed. Well done! 50% processed. The later part is much easier. Now we can move to the coin holder making process.
NEXT STEP: CREATING COIN POCKET

Small value but very useful coin.
Firstly, in order to make the inner coin purse has an eye-catching look, I use a small coin as a gauge to trim the corners.
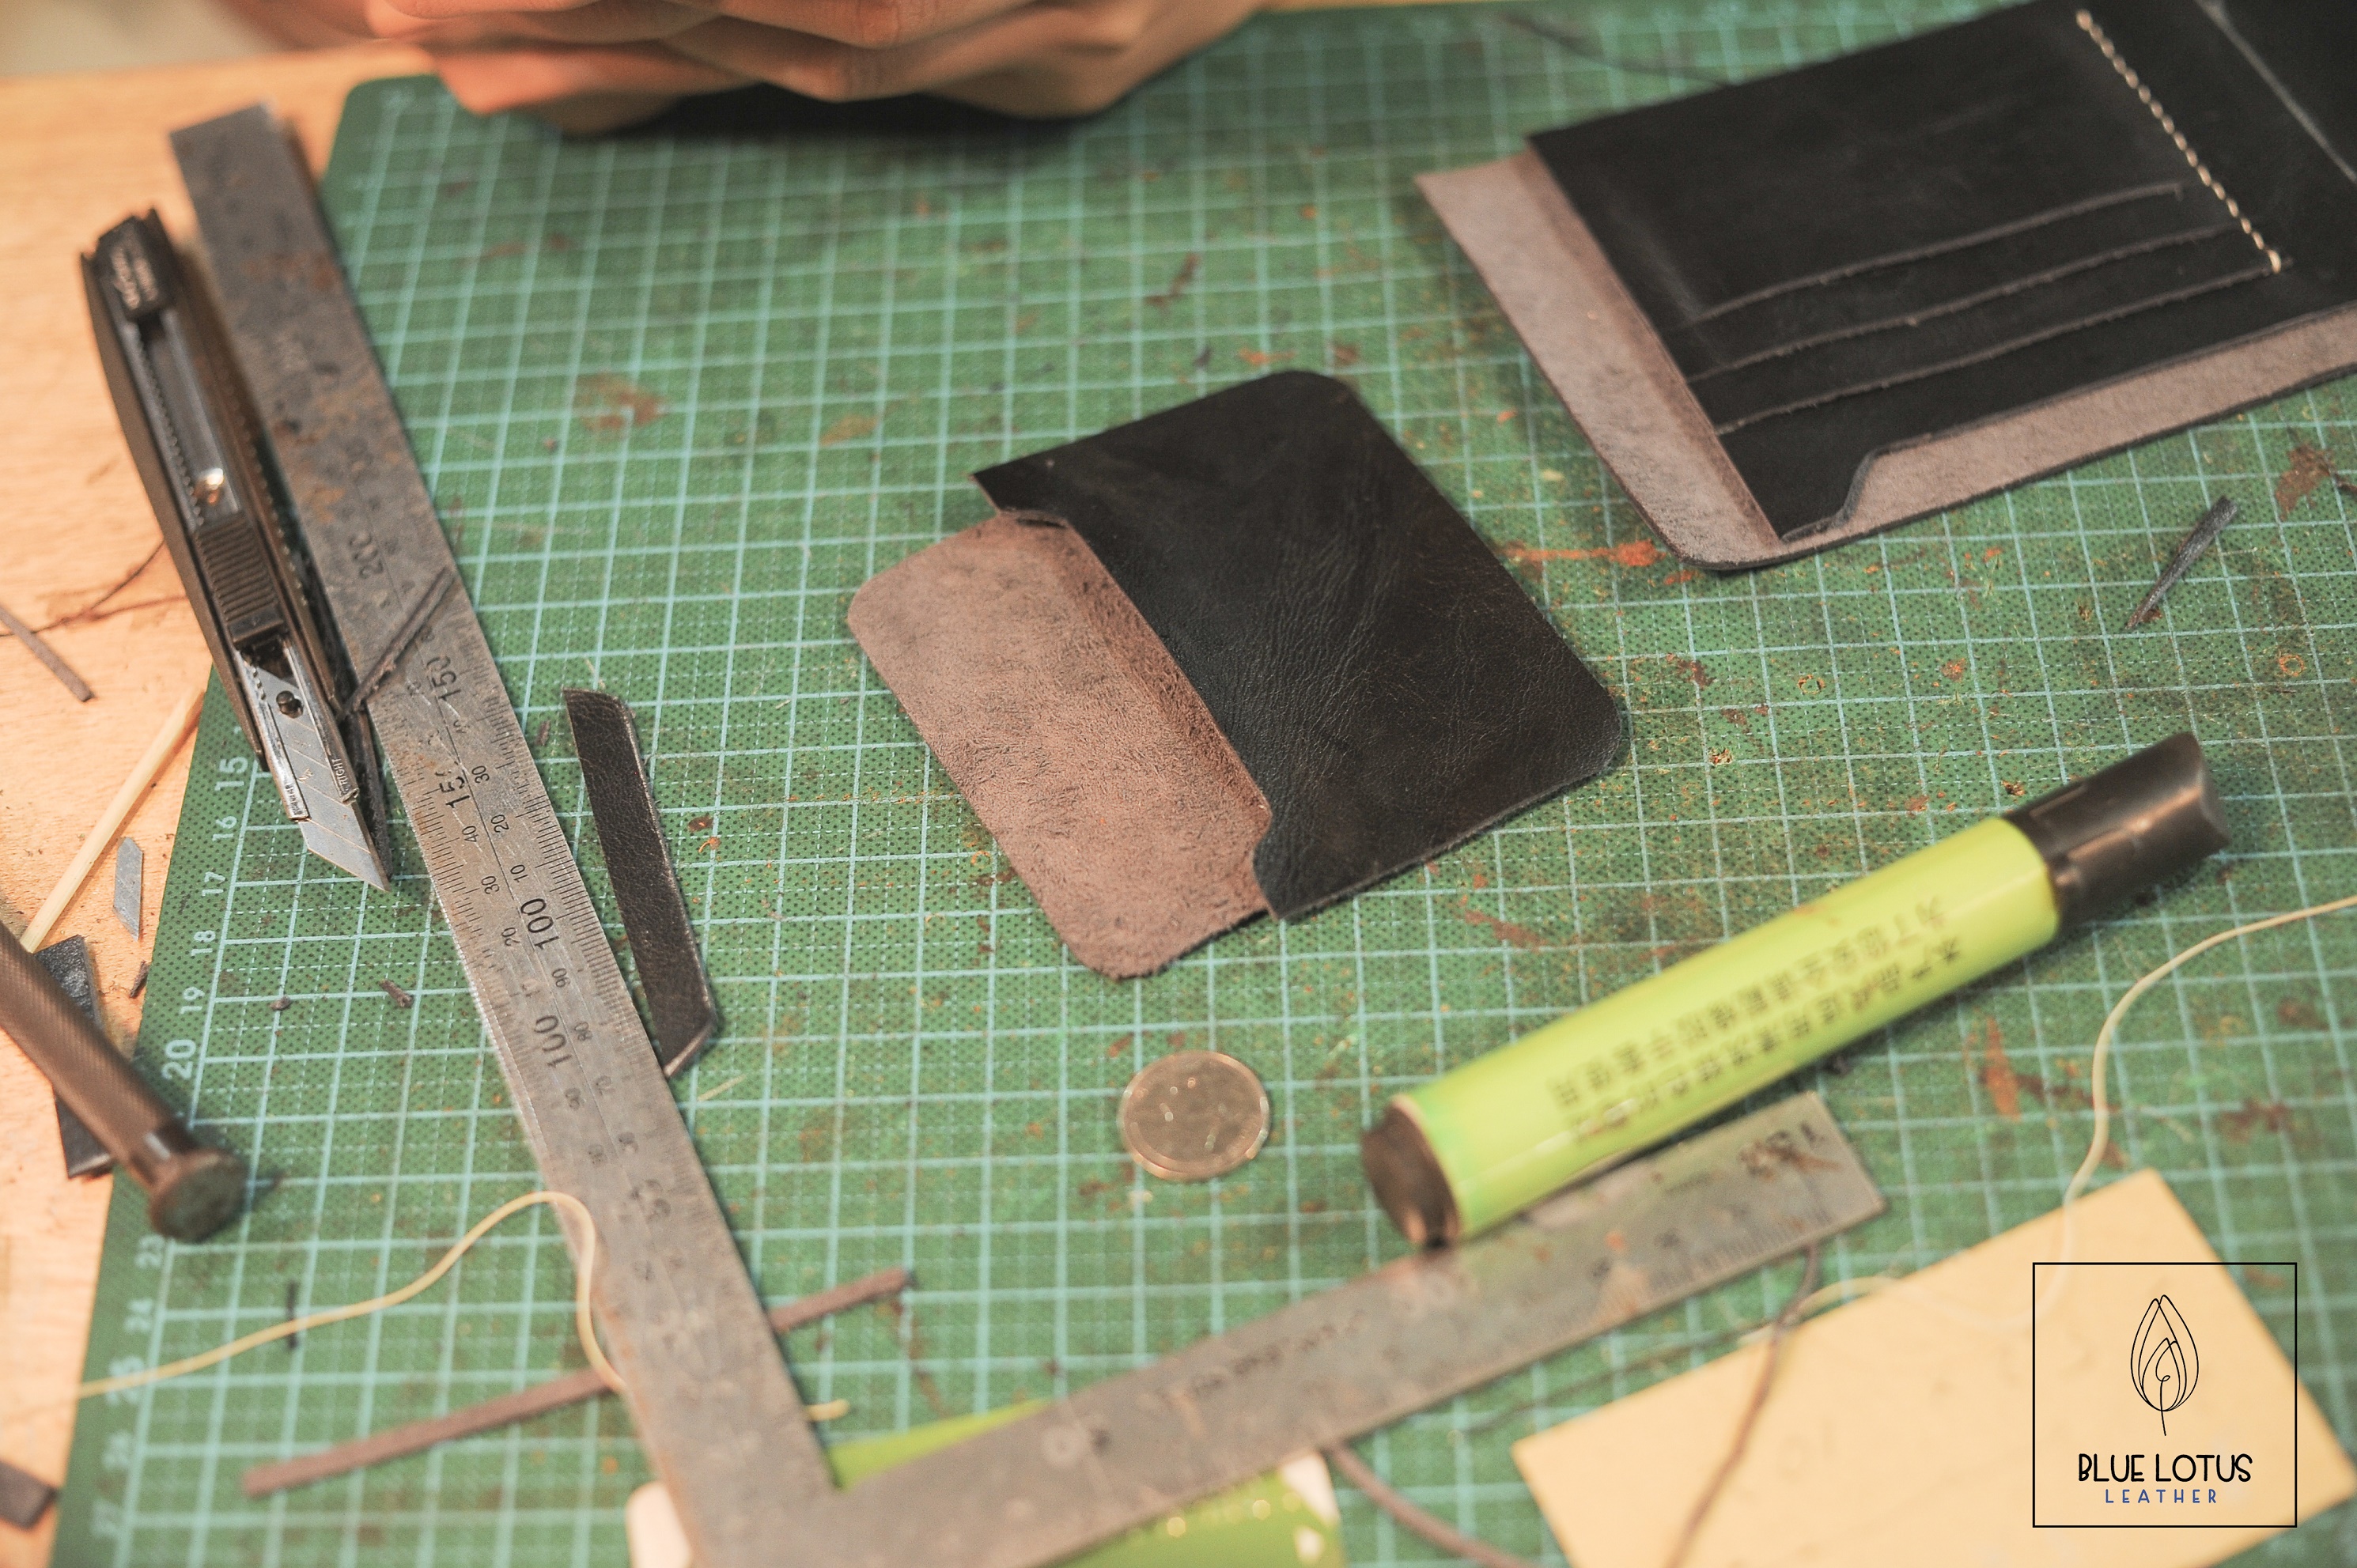
Ta daaaa!
Now a have a cutie, nice-looking coin holder for my man’s wallet
From now on, the process is basically is pretty much the same with the earlier steps I just showed you guys. Keep in mind the spell: Measuring, Gluing, Punching holes, stitching

Firstly, measure the position to place your coin pocket then punch some holes. Attach the cap first then cover it with the body layer later.

Don’t forget to glue them together for stronger adhesion

Punching holes
Be careful not to stretch the leather while you are sewing. Therefore, you might need a help from sewing clamp to stabilize your leather wallet. We will stitch toward ourselves. Now you have enough confidence to start hand stitching.
Since we will have 2 needles at 2 sides of the thread and need to pierce them in one hole at a time so there might be a possibility that one needle pokes into the back thread. To make sure you didn’t pierce the thread, you can check it by pulling the back thread back through the hole as we push the front needle into the hole. If it’s able to pull back and forth so you are good, keep stitching.
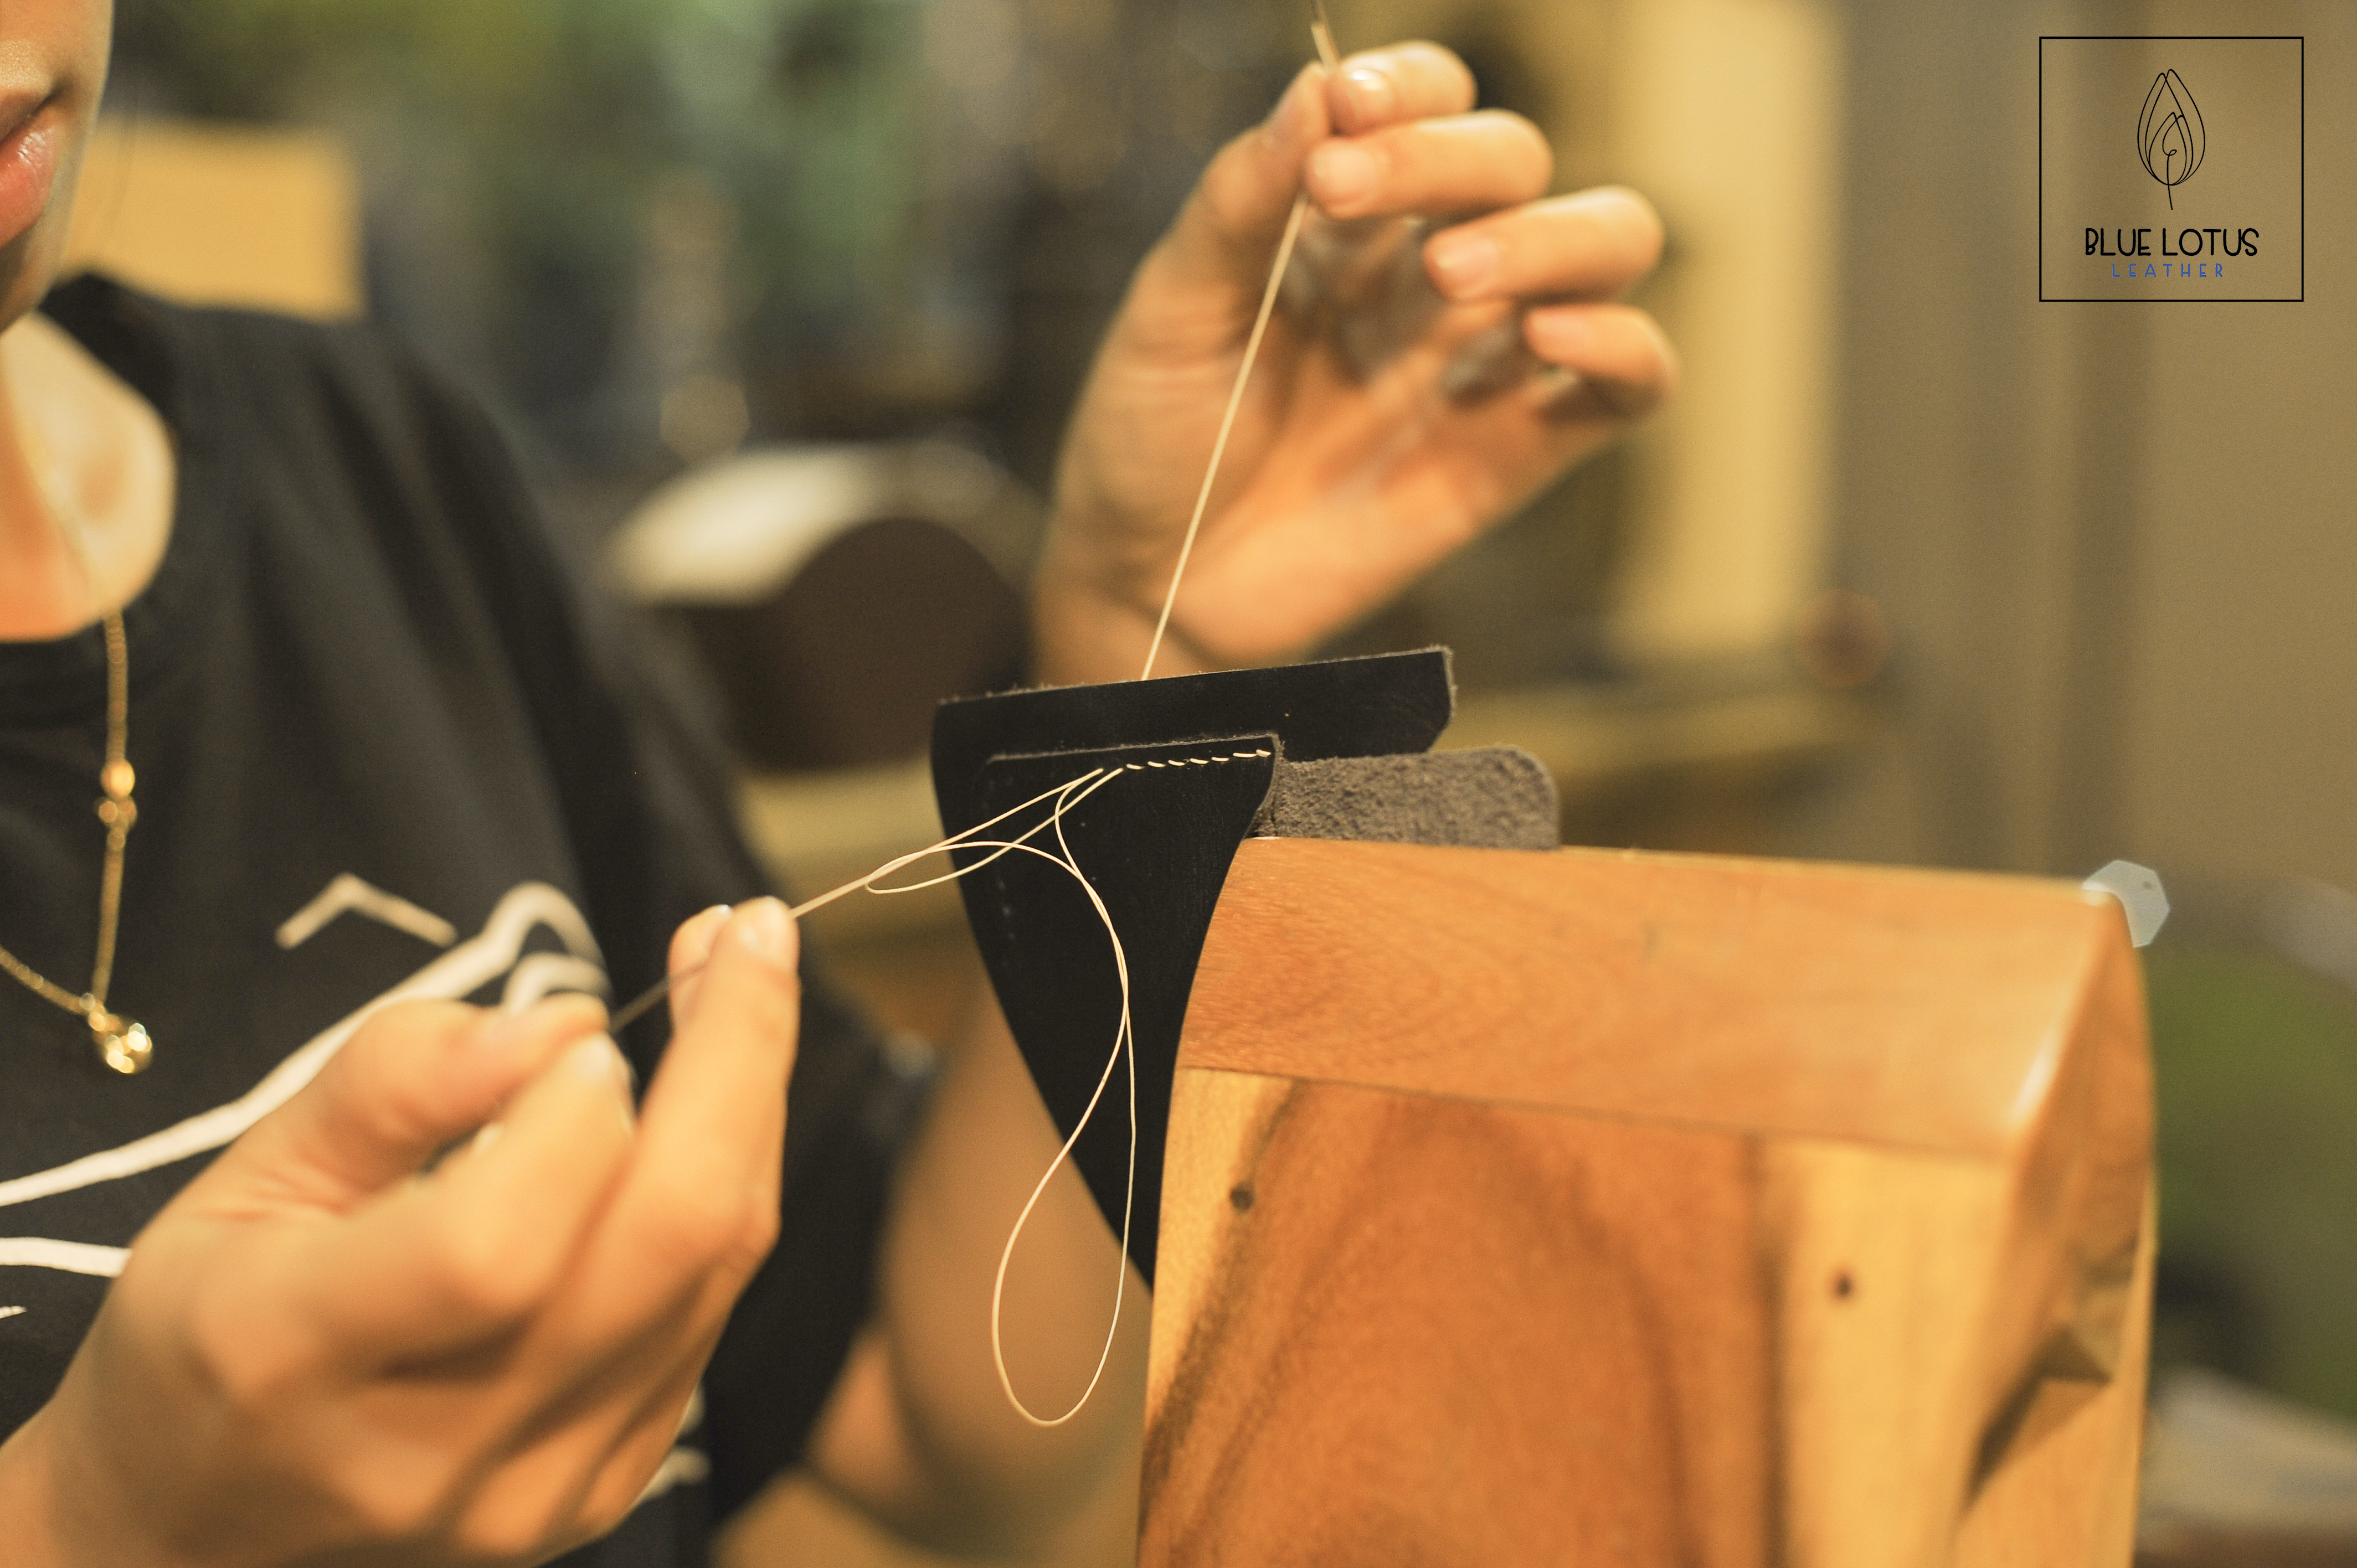
Hand stitching time
After finishing sewing all the small details together, remember the biggest leather piece we made at the beginning? Now it’s time to attach them to the wallet.
Only one thing needs to be aware of is that the two widths need to be attached together even though the length of inner and outer sides are uneven. It’s alright as we expect the bulge for the thickness of cash.

sew it along the yellow arrow direction
Once finished, use small scissors or a utility knife to cut the remaining threads as close to the leather as possible or using lighter the burn them is also works.
Final step: snap button to the coin pocket

Set the post down on the anvil and place the leather over it.

Place the cap over the leather and smack it down with the hammer.
You’re gonna need a hard surface to do this. The less bounce the better.
Andddddddddd… that’s it! You have finished crafting a men wallet. Congratulations!
If you planning to visit Hoi An, Blue Lotus leather handmade workshop is the best place to visit and we provide the best experience to do when you are here even if you have experienced working with leather before or not. Best way to craft your real leather goods from scratch (design patterns, cut leather, do punch holes, hand-sew and personalize). We’re always here to help you design what best fits your needs.
So don’t hesitate to join us for a fun workshop in Hoi An. Good vibes, good music, best coffee in town included 
===============================
Blue Lotus Leather & Coffee Shop
Address: 98 Hung Vuong, Hoi An, Vietnam
Hotline: + 84 916-183-279